 Navigation
 Introduction
As well as being able to allocate from a large library of surveys, the BounceTogether platform enables you to create bespoke surveys on any content you want. This topic describes how you can create your own.
In order to follow the steps in this article, you must first be logged in as a user with Administrative permissions. If you do not have the options contained within this topic, it is likely that you do not have permission. Check with your Bounce administrator if you are unsure.
Continue with this article when you have logged in as a user with permission.
Survey Setup
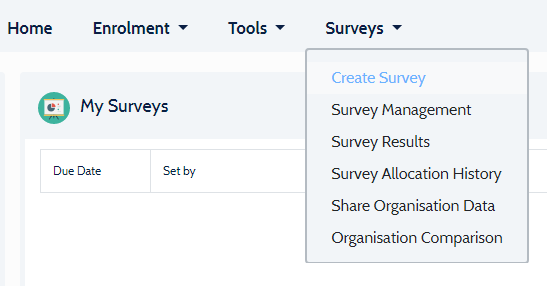
From the main menu, click Surveys / Create Survey
Enter the basic details about the survey you are creating by completing the text boxes that are shown on the initial screen.
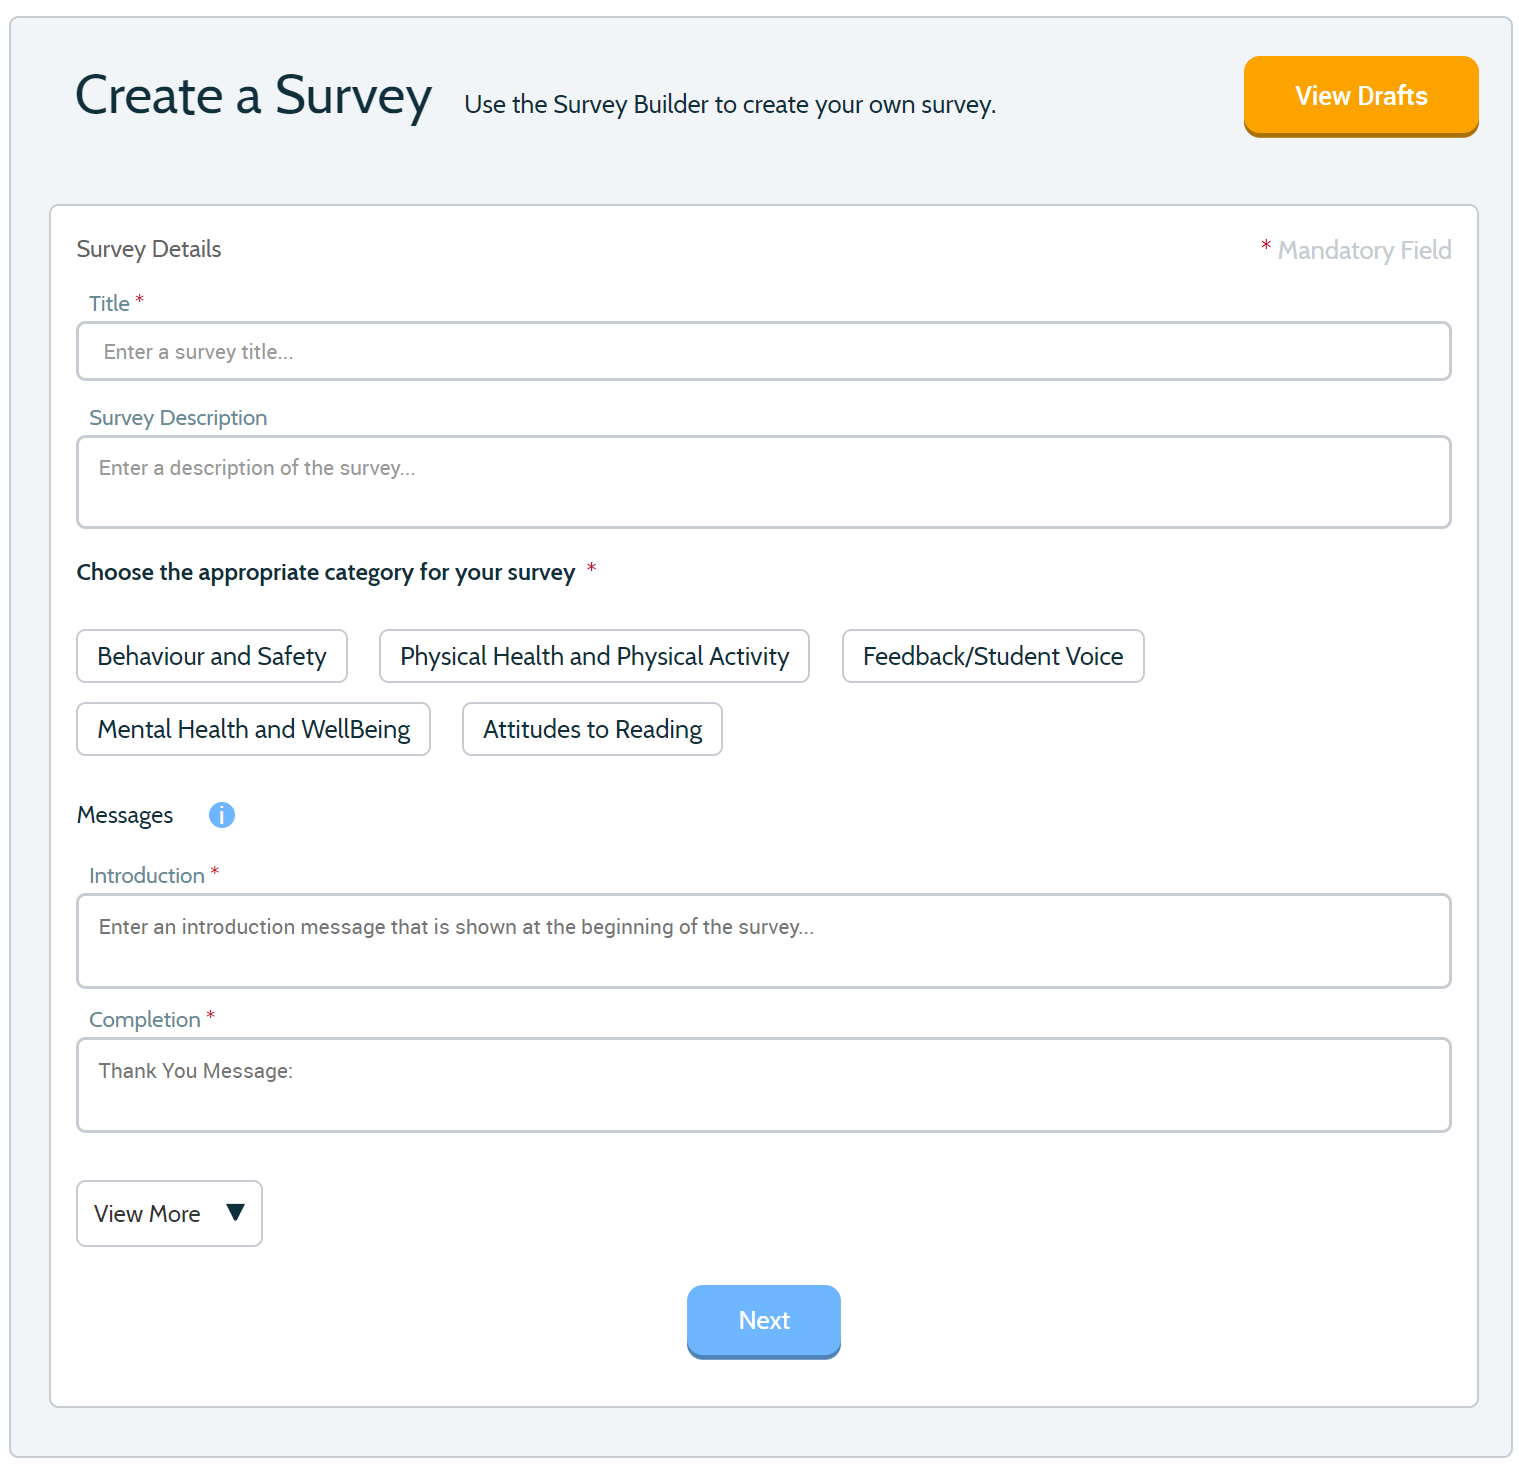
In this example, we're creating a 'pupil voice' survey but you can create a survey on anything you like.
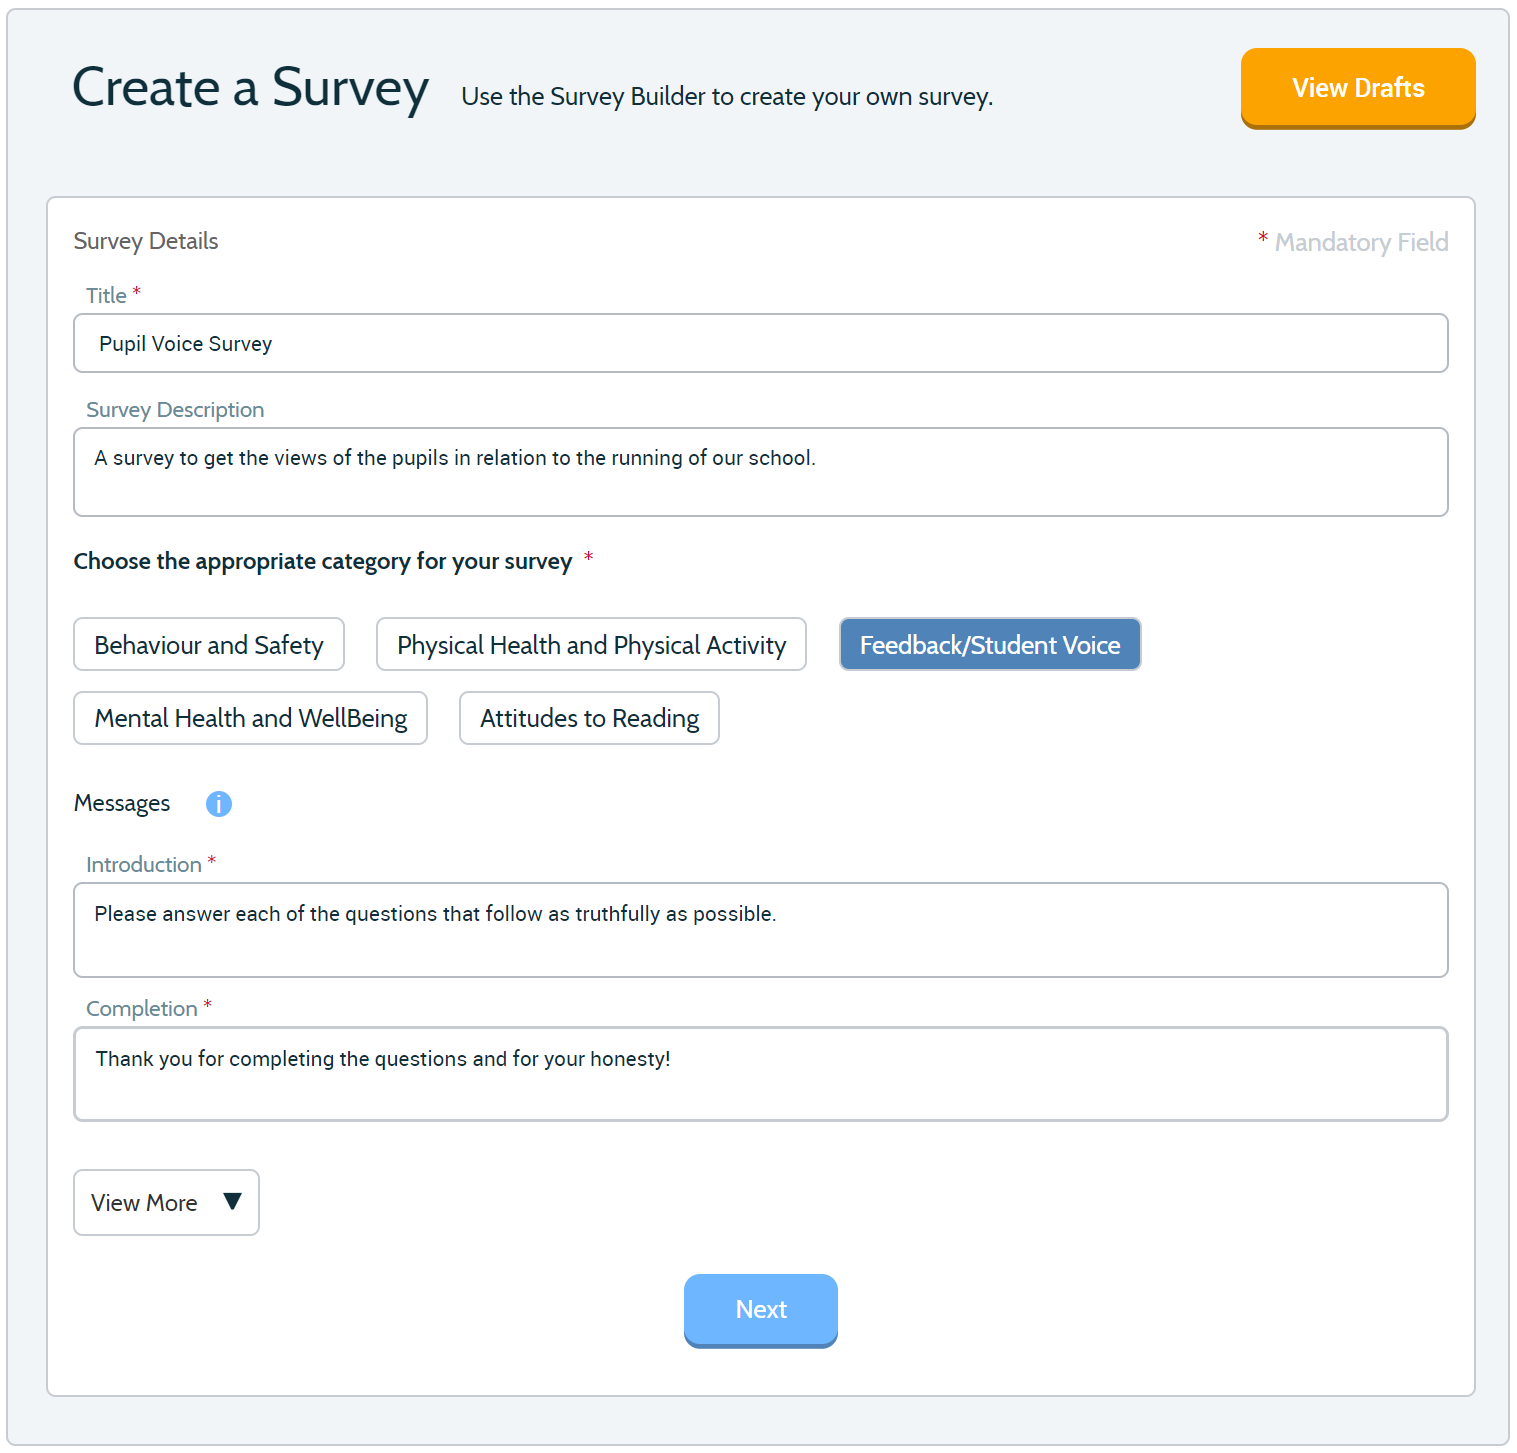
Click Next when you are done.
Question Types
Now you have setup the survey, you can add questions to it. There are a varety of question types to choose from, which are described below.
Text Box. This 'open' question type lets the user respond to the question in their own words. You can cap the number of characters in this question type by entering a "maximum" and specify a minimum number of characters they must enter by using the "minimum" box.
Multichoice. This question type lets you add a number of options but only lets the user pick one of them when taking the survey. This is desired for questions where you only want a single response. This is typically the most commonly used question type and you will find this in many of the questionnaires on our platform!
Ofsted. Similar to "Multichoice", this question type lists some pre-defined responses using a 5-point likert scale.
Check Boxes. The check box option lets you specify a number of items as a response and gives the user the ability to pick as many (or as few) as they like. For example, if you ask the user "what fruit they eat from the following", you might list "Apples", "pears", "grapes" and "Oranges". The user would be able to pick all of them when answers the question!
Visual. The visual question type lets the users pick from (currently) 3 different visual options.
Adding Questions
Now that you know what question types you can choose, you can build up the questions in your survey by clicking one from the left menu.
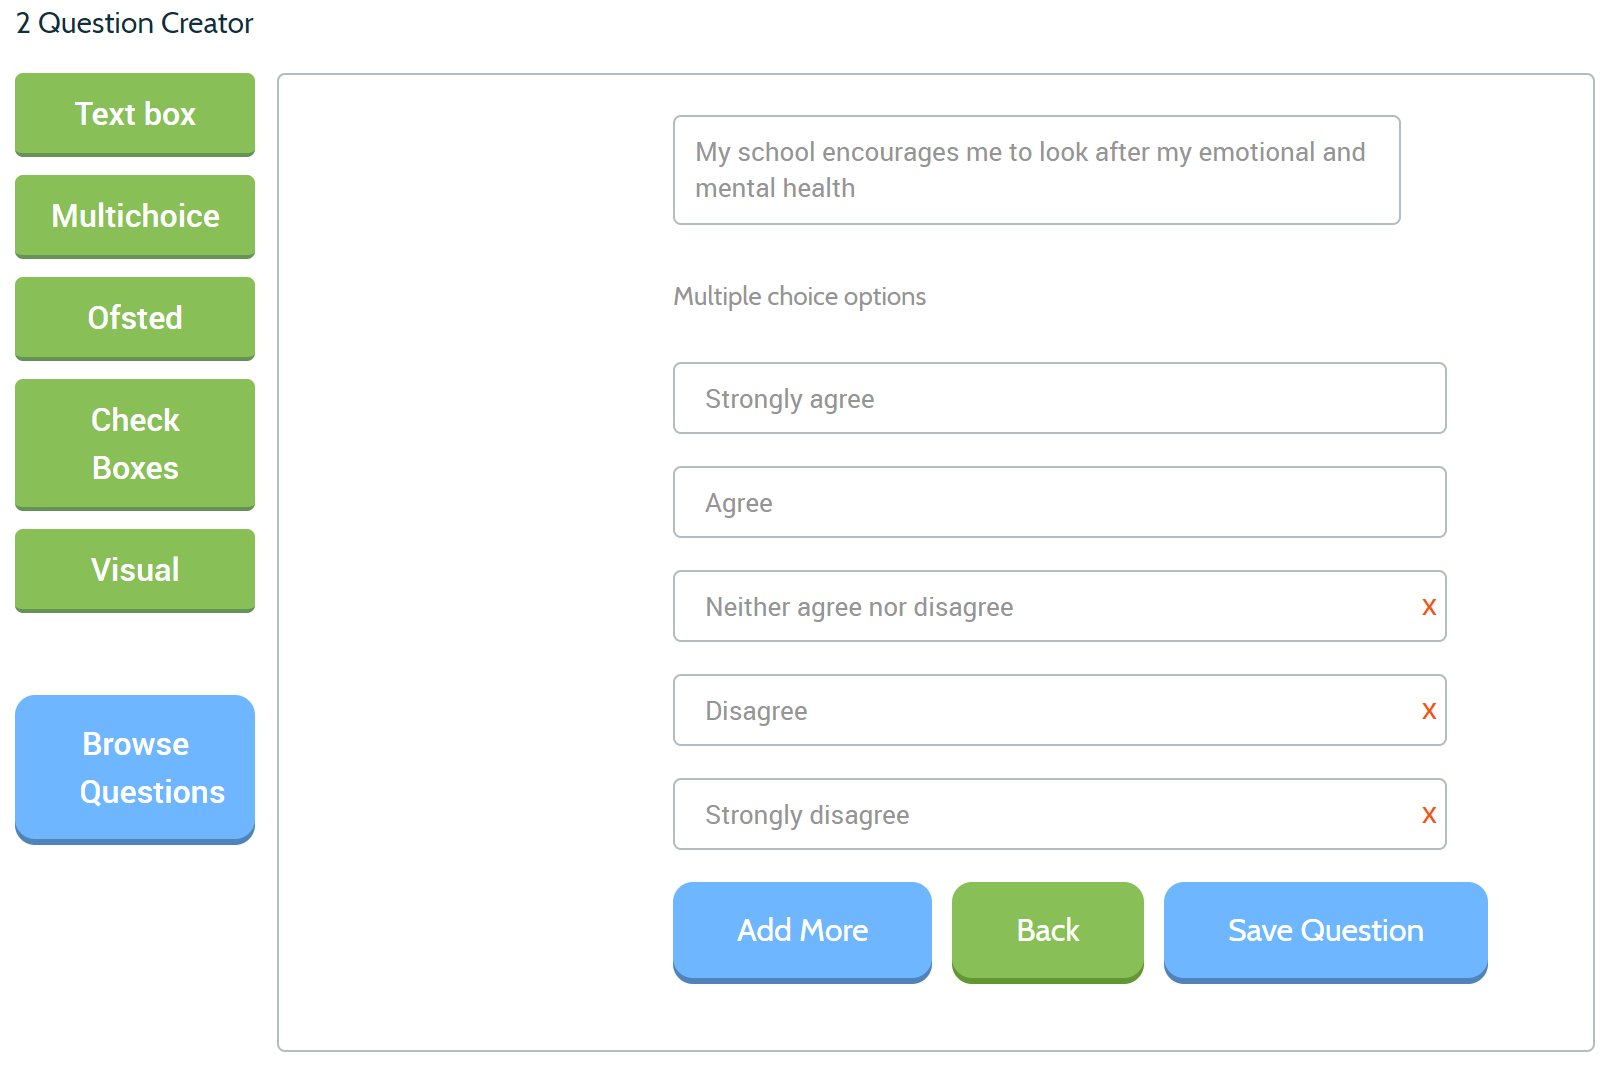
Once you have picked a question type from the left, on the right you will be able to enter the options applicable to that question. In this example, you enter your question followed by a minimum and maximum length.
Once you are done, click
Completion
You don't have to complete your survey in one go, you can save it as 'draft' and come back to it later if you wish. Also, you can preview how it will look to the user at any time by clicking Preview.
When you have added all of the questions you want to include in your survey and are happy with how it looks, you can complete it! Before you do this however, make sure you are absolutely happy with it, as this action cannot be undone.
Click Finish to complete it. You will then be able to assign it to your users!